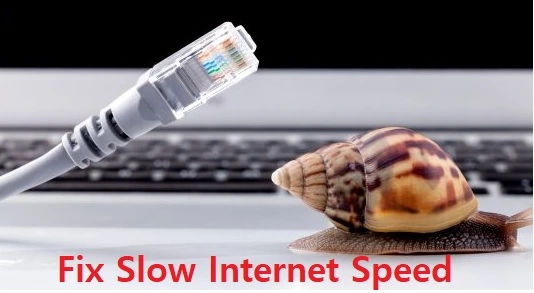
12 Tips To Fix Slow Speed of Your Internet?
Your high-end smartphone, desktop, laptop, and other smart devices are as good as your internet. Your device is hardly of any use if it’s not getting proper speed from your internet network. As there can be numerous reasons responsible for making your internet speed slow, it can be a bit difficult to overcome the issue. However, if you have taken a subscription to the lowest internet package offered by your ISP, your internet might not be leaving you with an adequate bandwidth. No matter the reason preventing you from getting the maximum speed from your internet network, here are the workarounds that can help you fix the slow speed of your internet.
Ways to Fix Slow Speed of your Internet
Check General Settings
The basic thing to look for when experiencing speed issues with your internet is the general settings. Below are the common settings that you should check.
-
Make Sure to Update your Internet Items

It is recommended to keep your computers, smartphones, tablets, and consoles running with the latest updates. Not updating your devices may lead to a drop in internet speed. Generally, you will receive notification for the available updates, so, whenever you see one, make sure to update your system by following the prompts provided in the notification.
-
Avoid Running Services Unnecessary

One of the most common reasons responsible for slow-internet speed is the situation when you are trying to run multiple services that consume a lot of bandwidth. Such services include using Netflix, YouTube, playing Online Video Game, etc. at a single time. To enhance your internet speed, it is recommended to use one program at a time. Moreover, make sure to exit from the applications using the internet rather than minimizing them. When you leave an app running in the background, it still consumes the speed of your internet.
-
Turn off other Internet-Connected Items

Shutting off bandwidth-heavy applications on your computer will help in enhancing the performance of your browser. If multiple computers/smartphones/entertainment devices are connected to your network, they will keep on making your internet to run with slow speed. In such a case, it is recommended to limit the number of other devices sharing your internet by turning them off temporarily. Alternatively, you can set internet-connected items in Airplane Mode as well.
-
Change the Channel of your router

Generally, modern routers come with two bands – 2.4GHz band and 5 GHz band. While the 2.4 GHz is the standard for wireless communication, the 5 GHz band supports faster downloads and results in limited interference. If your router has a 5 GHz band, switching to it will protect it from interference occurring from other internet-connected items and wireless connections available nearby.
- Switching to the 5 GHz band is quite easy as you can easily do so by going through your Wi-Fi settings. The name for your router’s 5 GHz band might be different from others, so you will need to check manual or online documentation of your router.
- As not all routers come with 5 GHz bands, you may need to skip this step.
- As 5 GHz bands have a less range compared to 2.4 GHz bands, using it will require you to keep your connected device within 10 to 15 feet of the router.
-
Use Ethernet instead of Wireless

Although Wi-Fi is convenient, it can also lead to different problems because of connectivity errors. To get the most consistency out of your Internet connection, you will need to plug your computer (or other devices) into your router or modem using an Ethernet cable.
-
Scan your Computer for Viruses

Sometimes, viruses can affect the functionality of your computer and the speed of your internet connection. In such a case, it is suggested to scan and repair your computer using a reliable antivirus program to clear the viruses from your device.
-
Switch to a Fast Web Browser

If you are using an outdated version of a web browser, you are most likely to experience slow internet speed when browsing the web. In such a case, it is best to either update your web browser or switch to modern web browsers such as Google Chrome, Mozilla Firefox, Microsoft Edge, Apple Safari, etc.
-
Delete Unwanted Add-Ons, Plugins, and Extensions

While add-ons, plugins, and extensions are used to enhance the browsing experience, they sometimes also affect the performance of page loading. Therefore, it is suggested to remove unwanted add-ons and browser enhancements to enhance the speed of your internet. The steps of removing add-ons and extensions may vary according to the browser you are using.
-
Avoid Using Multiple Tabs and Browser at Once

When you have opened multiple tabs in your web browser, the speed of your internet gets divided between the pages, thus, making your internet slow. Therefore, you should make sure that there are no unwanted tabs running on your browser. Also, try not to use multiple web browsers such as Chrome or Firefox running at the same time. This can also lead to slow speed internet.
-
Try Streaming Content When Not Performing any Other Tasks

You may like to watch Netflix or play YouTube videos songs when working in a different window or in your computer system, however doing so is also one of the reasons responsible for slowing down your internet speed. See if closing these apps help you improve the speed of your internet.
-
Change the DNS Settings on Windows

Changing the DNS settings on your Windows can also help fix the speed issues with your internet. Below you can find the steps to change these settings, however, before following them, make sure that your device is connected to the internet.
- Go to the Start menu and open the Settings app.
- In the Settings app, click on the Network & Internet option.
- In the Network & Internet section, you will need to select Change adapter
- Next, select your current network and click on the Properties button located in the lower-left side of the pop-up window.
- Then, select Internet Protocol Version 4 (TCP/IPv4) or Internet Protocol Version 6 (TCP/IPv6)
- After that, click on the Properties button located near the bottom of the window.
- In the Properties section, select the option – Use the following DNS server addresses located near the bottom of the window.
- Enter DNS addresses as suggested below for different browsers:
Google —
- For IPv4: Enter 8.8.8.8 in the “Preferred DNS server” text box, then enter 8.8.4.4 in the “Alternate DNS server” text box.
- For IPv6: Enter 2001:4860:4860::8888 in the “Preferred DNS server” text box, then enter 2001:4860:4860::8844 in the “Alternate DNS server” text box.
OpenDNS
- For IPv4: Enter 208.67.222.222 in the “Preferred DNS server” text box, then enter 208.67.220.220 in the “Alternate DNS server” text box.
- For IPv6: Enter 2620:0:ccc::2 in the “Preferred DNS server” text box, then enter 2620:0:ccd::2 in the “Alternative DNS server” text box.
- Finally, save your changes by clicking on the OK button and flush your computer’s DNS cache by typing ipconfig/flushdns into the Command Prompts and pressing Enter key on your keyboard. Restart your computer and you are done.
-
Change the DNS Settings on Mac

- Make sure you are connected to the internet.
- Open the Apple menu and select System preferences option from the drop-down menu.
- Next, click the Network button and select your internet connection. You will need to select Ethernet if you are using Ethernet.
- Then, click on the Advanced button and select the DNS
- After that, click + button located in the lower-left side of the window. This will create a text field in the DNS Servers
- Now, you will need to enter the primary DNS address as suggested below:
- Google — Enter 8.8.8.8 here.
- OpenDNS — Enter 208.67.222.222 here
- Then, you will need to enter the alternate DNS address provided below by clicking + icon.
- Google — Enter 8.8.4.4 here.
- OpenDNS — Enter 208.67.220.220 here.
- After that, click on the OK button and then on the Apply button to save the changes you made.
- Now, to flush your Mac’s DNS cache, you will need to type – sudo killall -HUP mDNSResponder; say DNS cache has been flushed into Terminal and press Enter key on your keyboard. This will help in resolving any website loading error you may experience when you open your browser next time.
- Finally, restart your Mac to see if the problem is fixed with your internet speed or not.
So, these are the different workarounds that you can follow to fix the speed issues with your internet network.

7 Steps To Fix Xfinity WiFi is Connected but No Internet?

How to Get Wi-Fi At Home Without Cable?