How to Self-Install Suddenlink Internet? Check Now

Suddenlink Communications is one of the premium internet service providers, which has a wide-scopic audience for cable, TV, and telephone service throughout the United States. The company conveys web access to the homes through the cable lines that ordinarily give quicker speeds than the DSL connection. Despite its rural underpinnings, the ISP facilitates internet connection speed ranging from at 50 Mbps that gets up to 1 Gbps in the selected locations.
In addition, the service also supports 24/7 customer service, in case of any queries and mislead by the users. By choosing Suddenlink Communications you will be benefited from access to reliable service technicians and unlimited data plans.
Here on this page, we will be going to talk about how to self-install a Suddenlink internet connection. Let’s jump into the steps.
Suddenlink Self-Installation – Step-by-Step Guide
When you subscribe to the Internet service from Suddenlink Communications, the company sends you a cable modem to your mentioned address link. Moreover, at the initial stage, you get an opportunity to choose either technician help or do the installations step by yourself. However, if you choose to install it yourself, you will require to follow-up on the directions guided below.
1) Note Down Your Activation Date – The activation date is an important aspect, which is useful to complete Suddenlink Self-Installation steps. Even if your box of Suddenlink equipment arrives early, you will require waiting until your activation date to connect the cable modem to the network. Users won’t be able to join the internet service or test it before the activation date.
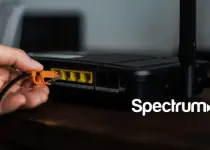
2) Have a Look on Your Suddenlink Equipment – Once you get the delivery of the Suddenlink equipment box, the next step is to check all the equipment available in the box. There will be six items presented in the box, which includes: a cable modem, coaxial cable, power adapter, Ethernet cable, instructions menu, and two-way cable splitter. In case, any of the given item is missing from your box, contact officials at Suddenlink Customer Support Number.
3) Select a Location – Opt for a location at your home where you can easily access both cable and power outlets/electric plugs. A decent location helps to transmit the internet signal throughout your home.
4) Turn-off the PC – Once you did all the above-guided steps, you are advised to power down your pc or laptop before preceding the installation steps. Doing this can help you to prevent signal confusion and interference at the time of the activation phase.
5) Connect the Suddenlink Cable Modem – Now, it’s time to connect the coaxial cable to the cable wall outlet and the post named “Link In” on the back of the modem. Plugin the power cord into a wall outlet and secure the connection with the modem.
6) Attach the Ethernet Cable – With the cable modem connected to the cable line and a power outlet, plug in the Ethernet cable and secure the connection either with a computer or router.
7) Gaze for the LED Light – If all the associated connections are secure and working appropriately, the “online” LED light located at the front of the modem will turn into blue light.
8) Turn On The PC/Laptop – Once you power on the pc, you require to select either the Internet Connection Wizard (Windows) or System Preferences (Mac OS).
9) Perform the Internet Connection Wizard (Mac OS Only)
-
- To begin with, click on the Apple icon (located at the upper left-hand corner) and navigate to “System Preferences.”
- Now, select the “Network” icon and once it opens, tap on “Advanced”.
- It will direct you on the new page, where you need to click on “TCP/IP.”
- Search for the “Configure” dropdown and select “Using DHCP.”
- Click “OK.” And you will return to the basic “Networks”
- Save your final settings and close “System Preferences.”
10) Perform the Internet Connection Wizard (Windows Only)
11) Click the “Start” button on the main screen located at the lower left-hand area of the screen.
12) Click the option “Run.” And when the window opens, type “INETWIZ” in the address bar and click “OK.”
13) After this, the Internet Connection Wizard will open in your available screen. When it does, explore the option, which says “Connect using my local area network (LAN)” and tap “Next.”
14) The option will direct you to the next screen, where you need to uncheck any of the checked boxes before going to the “Next” option and click on it.
15) After this, the following screen asks if you would like to set up your email account. You can skip this procedure if you plan to configure your email through the Suddenlink web portal or another email client including Outlook or Mail.
16) Now, tap “Next” to proceed ahead.
17) Finally, to conclude everything, click “Finish” to save your settings.
On the completion of the steps above, you are ready to use internet services. However, in case, you want professional team support, you can get it right using the online chat, email or phone support feature to discuss your issue with an agent.