6 Steps to Change HughesNet WiFi Password

It is always recommended to protect your HughesNet WiFi network using a strong password. Having a strong password configured for your WiFi network or even online accounts helps protect them from getting hacked by anyone. To create a strong password, it is always best to use a combination of numbers, special characters, and alphabets (both small and capital letters).
Creating this type of password makes it difficult for the person to guess who could be trying to get access to your WiFi. Apart from using a strong password, it is also suggested to keep changing your password every few months. If it has been quite a long since your change the password of your HughesNet WiFi account, you can follow the information provided below to change HughesNet WiFi Password and replace it with a strong password which difficult to hack.
Guide to Change HughesNet WiFi Password
Changing the password of your HughesNet WiFi is quite easy. However, to follow the process, you will first need to access the System Control Center. The System Control Center is known for providing access to system status configuration information and online documentation. To get to the System Control Center, you will need to follow these steps:
- Open a web browser such as Google Chrome, Mozilla Firefox, or Internet Explorer on your computer.
- In the address bar, you will need to enter systemcontrolcenter.com and press the Enter key on your keyboard.
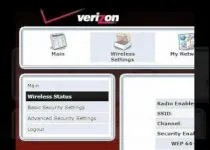
- Once you are on the System Control Center page on your browser, you will need to select the WiFi Settings link located on the left-hand side of your screen.
- The default password is going to be “admin”, so enter the same in the dialog box when prompted and press the Login
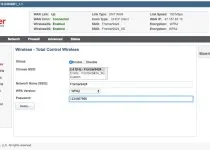
- Once you are logged into the WiFi settings screen, you will see the current password shown in the Password To change your password, all you will need to do is clear the field and enter the password with which you wish to secure your WiFi network.
- Once you are done creating the new password, you will need to click on the Save Settings option and exit from the System Control Center.
Congratulations! Your HughesNet WiFi password is changed. In addition to this, if you ever wish to change the password of your HughesNet account, you can do so easily by following these steps.
Steps to Change HughesNet Account Password

- To begin with, you will first need to sign in to your myHughesNet.com account using your current password.
- Once you are logged in to myHughesNet.com page, you will need to click on the My Account option located at the top of the page. In the My Account section, you will need to click on the Profile Doing so display a list of email addresses associate with your account.
- Once you located the email address that you are looking to modify, you will need to click on the “Manage” option.
- As you will click on the Manage option, you will be directed to the next screen where you will be prompted to enter the current password of your HughesNet account.
- After entering the current password in the provided field, you will need to complete the reCaptcha by selecting the checkbox next to the “I’m not a robot” option.
- Then, you will need to click on the OK You will be directed to the next screen where you will be prompted to change your password.
- On the next screen, you will need to provide information such as your First Name, Last Name, New Password, and Preferred Email. Also, you will need to select 3 security questions and provided answers for them. Make sure to remember the questions and answers correctly they are helpful in case you ever forget the password of HughesNet.
- Once you have entered all the information correctly and created a new strong password for your HughesNet account, click on the OK button and you are done. You can access your account now using your new password.
So, these are the steps that you will need to follow to change the password of your HughesNet WiFi network and HughesNet account.
3 Ways To Change FiOS WiFi Password?
10 Ways To Change Frontier Wifi Password?